Pixelity Tech / Field note
How to Map an Approval Workflow
Approval workflows fail when policy lives in email and memory. This guide shows how to map thresholds, roles, evidence, and exceptions before software is built.
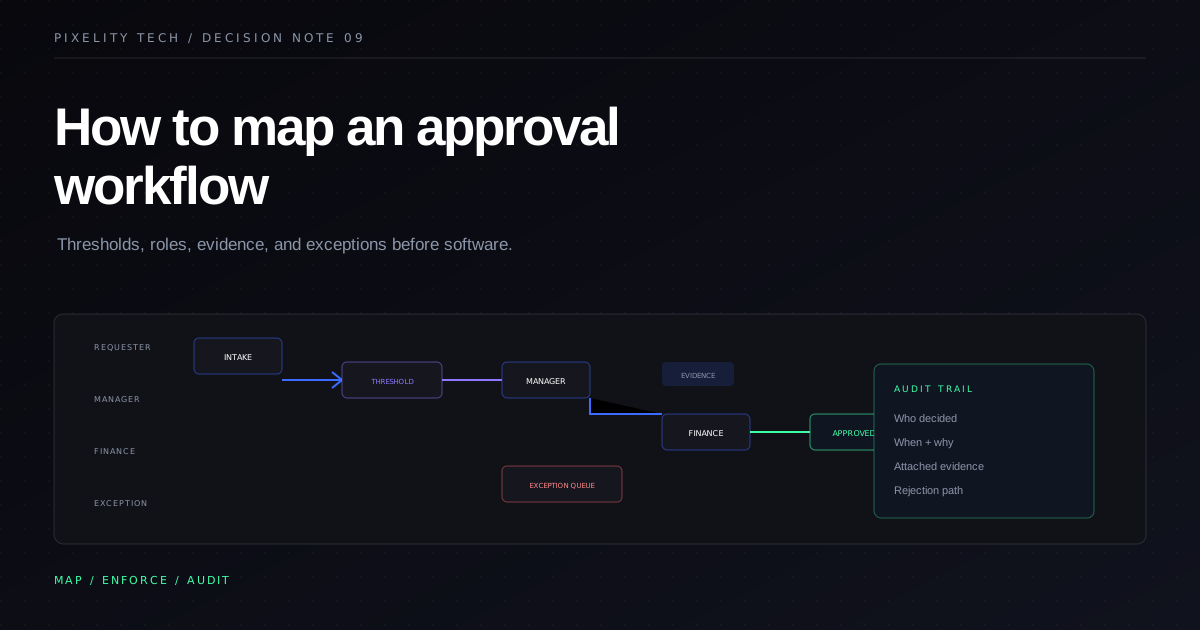
An approval workflow sounds simple: someone requests, someone approves, work continues.
In practice, approvals are where policy, authority, evidence, timing, and exceptions collide. Email threads hide parallel conversations. Spreadsheets encode state with color. Managers approve from memory because the supporting detail is three attachments deep.
Software cannot fix an unmapped process. It can enforce a clear one. Mapping is the work that makes approval systems worth building.
What you are mapping
An approval workflow is not only a sequence of names. It is a contract that answers:
- what can be requested;
- what evidence must accompany the request;
- how requests are classified;
- who may approve at each level;
- what thresholds trigger escalation;
- how long each step may wait;
- what happens on rejection, expiry, or ambiguity;
- which record systems update after approval.
If any answer is “it depends who you ask,” capture those branches explicitly. Ambiguity is not a failure of mapping. It is information the system must represent.
Step 1: Choose one approval type
Do not map every approval in the company at once. Select one type with a committed sponsor:
- purchase or CapEx spend;
- discount or commercial exception;
- hiring or headcount;
- contract or legal review;
- customer credit limit;
- document release or policy exception.
Prefer a process that runs weekly, has measurable delay, and already frustrates finance or operations leadership. The automate approvals use case follows this narrowing principle.
Step 2: Trace the real path, not the policy PDF
Interview requesters, approvers, and the people who chase status. Observe live examples, including rejected and stalled cases.
Document:
| Stage | Questions |
|---|---|
| Trigger | What event starts the request? |
| Intake | Where is the request created today? |
| Evidence | Which documents or fields are required? |
| Routing | How is the approver chosen? |
| Decision | Approve, reject, return, escalate — what options exist? |
| Communication | Who is notified, and when? |
| Completion | What systems or teams update after approval? |
| Exception | What cases do not fit the standard path? |
Pay attention to workarounds: verbal pre-approvals, side channels, “just this once” overrides. Workarounds reveal missing rules or thresholds that are too coarse.
Step 3: Define request categories
Most approval pain comes from treating different request types as one flow.
Split categories when any of these differ:
- required evidence;
- approver roles;
- financial thresholds;
- legal or compliance checks;
- downstream systems affected.
Each category should have a short name operators use in conversation. Software can present categories as intake choices that drive routing.
Step 4: Model authority with thresholds
Authority is usually tiered. Map it as explicit bands rather than narrative paragraphs.
Example structure for spend:
| Amount band | Approver | Additional conditions |
|---|---|---|
| Up to 5,000 | Department manager | Budget code required |
| 5,001–25,000 | Department head + finance reviewer | Quote attached |
| Above 25,000 | Executive committee | Business case attached |
Thresholds should use fields the intake form can validate. If approvers mentally adjust bands based on context, add exception routing rather than leaving bands implicit.
Delegation matters: vacation coverage, acting roles, and regional authority. Record whether delegation is permitted, time-bound, and auditable.
Step 5: Specify evidence and validation
Approvals without evidence become rubber stamps. List mandatory attachments and fields per category:
- identifiers linking to customer, vendor, or project records;
- monetary amounts with currency;
- effective dates;
- policy exception reason codes;
- links to contracts or quotes.
Validation rules belong in the map:
- required before submission;
- required before a given approval tier;
- warnings that allow submission but flag review.
The operations command center demo illustrates how evidence, status, and ownership appear together so approvers decide from context instead of hunting through email.
Step 6: Name states and transitions
Replace informal status with named states. A workable baseline:
- Draft — requester preparing
- Submitted — awaiting first review
- In review — with named approver
- Returned — more information required
- Escalated — higher authority engaged
- Approved — decision recorded
- Rejected — decision recorded with reason
- Expired — no decision within policy window
- Cancelled — withdrawn by requester
For each transition, define:
- who may trigger it;
- what fields are required;
- whether notifications fire;
- whether downstream integration runs.
Avoid states that mean different things to different teams. “Pending” is too vague if it mixes submission, review, and external dependency.
Step 7: Design exception paths
Exceptions are normal. Map them deliberately:
- Policy edge cases route to a specialist queue with full context.
- Missing data returns to requester with structured comments.
- Conflicts — duplicate requests, budget overrun — route to finance or legal.
- Emergency approvals require post-hoc review within a defined window.
A common mistake is forcing exceptions into the happy path. That erodes trust and produces silent overrides. A better pattern appears in mature automation: automate the core path and surface exceptions visibly. See when not to automate a process for deciding how much to encode initially.
Step 8: Connect to systems of record
Approvals are rarely the final system. After approval, something must update:
- ERP or accounting for spend commitments;
- CRM for commercial exceptions;
- HRIS for headcount;
- document repository for released files.
Map which system owns the approved outcome and whether integration is synchronous or batched. If updates remain manual after approval, measure how often they are delayed or skipped — that delay may be the next automation target.
This connection work overlaps with automation versus integration. Approvals are automation; posting results often requires integration with clear field ownership.
Step 9: Define service expectations
Approvers need realistic timing rules:
- target response time per tier;
- reminders before expiry;
- escalation when breached;
- holiday and timezone behavior.
SLA rules should be explainable to requesters. Hidden timers create suspicion.
Reporting should answer:
- volume by category;
- average cycle time by tier;
- aging backlog;
- rejection and return rates;
- override frequency.
High override frequency signals thresholds or categories that need redesign, not more reminders.
Step 10: Validate the map before build
Walk the map with three scenarios:
- Straightforward approval — all evidence present, within lowest tier.
- Escalated approval — crosses threshold requiring multiple tiers.
- Messy exception — missing data, duplicate request, or emergency path.
Each scenario should move from trigger to recorded outcome without undefined handoffs. If facilitators must narrate between boxes, the map is incomplete.
Prototype on paper or in a workshop before committing to software. Stakeholders align faster when they react to a visible flow than to a requirements document.
What software should enforce
Once the map is stable enough, software should:
- prevent submission without required evidence;
- route by category and threshold automatically;
- show approvers a single record with history;
- capture decisions with identity and timestamp;
- block unauthorized transitions;
- retain an audit trail for compliance;
- queue exceptions for human review.
Software should not hide policy changes. When thresholds shift, update the map, communicate to users, and version rules where needed.
Common mapping failures
Approving people instead of roles. Named individuals break when org charts change. Route by role with delegation rules.
Mixing approval with execution. Purchasing approval is not the same as placing the order. Separate states so accountability stays clear.
Ignoring rejection paths. Teams map happy paths; rejected requests bounce informally and leave systems inconsistent.
Over-automating day one. Map first, automate routing second, integrate posting third. The prioritization guide in what should a business automate first applies directly here.
From map to production
Translate the map into a delivery backlog:
- intake and categories;
- core states and permissions;
- threshold routing;
- notifications and SLAs;
- exception queues;
- integrations to systems of record;
- reporting and governance.
Ship a production slice that handles the highest-volume category before expanding. Partial coverage with clear boundaries beats a broad rollout that still allows email overrides.
Pixelity’s workflow automation service begins with mapping workshops because approval software built on vague policy becomes expensive shelfware.
When your team is ready to turn policy into an enforceable flow, map your workflow with Pixelity Tech.

When Not to Automate a Process
Automation is not always the right first move. Learn the operational signals that call for clarity, ownership, or integration before software executes a workflow.
Read field note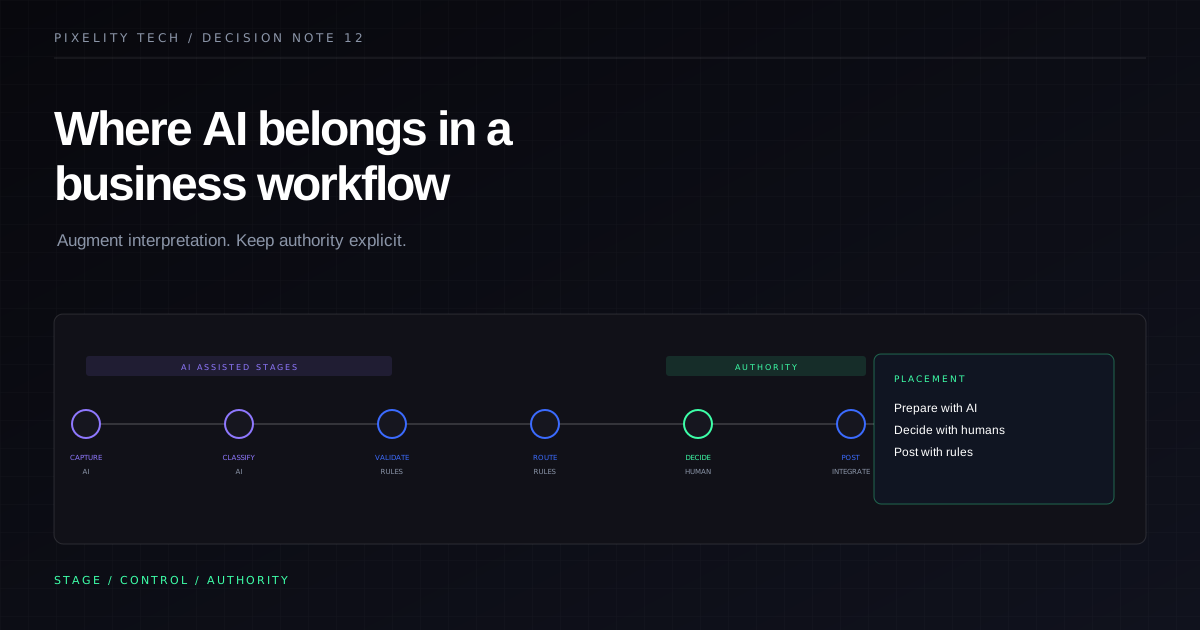
Where AI Belongs in a Business Workflow
AI creates the most value at specific workflow stages—not everywhere. Use this placement model to augment intake, classification, and preparation while keeping authority explicit.
Read field note